
Metamask Integration into the Platform: Secure, Easy-to-Use Access
As a cryptocurrency platform, integrating MetaMask functionality into existing infrastructure is essential to providing a seamless and secure experience for users. Metamask is a popular decentralized application (dApp) protocol that allows users to manage their digital assets across blockchain networks. In this article, we will explore how to integrate Metamask into our platform, ensuring secure transfer of user deposits between wallets and efficient withdrawal processing.
Why Metamask Integration?
Metamask offers several benefits for a cryptocurrency platform:
Step-by-step integration guide
To integrate Metamask into your platform, follow these steps:
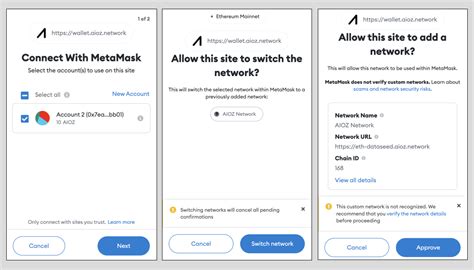
Step 1: Set up Metamask on the user’s device
Step 2: Integrate Metamask with your platform’s API
To integrate Metamask functionality into your platform, you will need to:
Example code snippet:
const metamask = require('metamask');
// Create a new wallet instance
const wallet = await metamask.create({
address: '0xYourPrivateKey',
network: 'mainnet'
});
// Store the wallet in the database
await db.insertUserWallet(wallet.address);
Step 3: Process deposits and withdrawals
To process deposits and withdrawals, follow these steps:
Example code snippet:
const metamask = require('metamask');
// Get the user's wallet address from the Metamask profile
const walletAddress = await metamask.getWalletAddress();
// Create a new transaction using the metamask library
const tx = {
from: wallet address,
to: '0xYourRecipientAddress',
value: 10n
};
// Send the transaction to your platform's network
await db.sendTransaction(tx);
Step 4. Process Payments
To process a withdrawal, follow these steps:
: Verify that the user sent funds from their wallet to your platform using Metamask.

